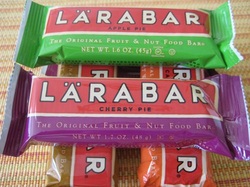
 Like so many people, I have a desire to eat healthier. Like so many people, I lack the FUNDS to eat healthier. Oh, in some areas it is easy. Organic veggies can often be somewhat reasonable. Keeping to the outside areas of the grocery store instead of going into the aisles is a pretty good tip (though not all that realistic. I, myself, make small steps towards a healthier lifestyle, but one area I cannot do are buying these healthy bars like Larabar or Luna bars or any of those. Imagine my excitement when a friend on facebook posted that she had made some homemade larabars today!! She said they were as good...or BETTER than the packaged varieties and I instantly asked...where's the recipe. She asked if she could post here and WHAT COULD I SAY?? OF course!! So, here is my friend, Kimberly Vogel, and her version of Larabars which she has decided to call Kim Bars. Please visit her site, where she endeavors to bridge families together. In the meantime, try her recipe!!
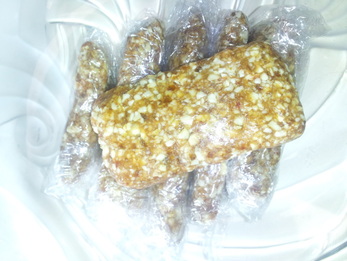
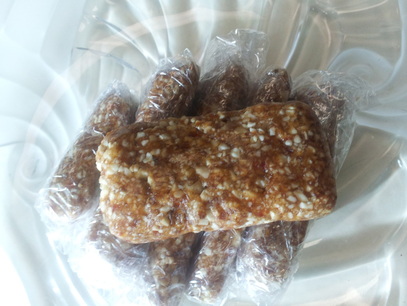
In my quest to eat healthy and avoid foods I have allergic reactions to, I found some great energy bars. Standing in the grocery aisle, I read the ingredient list – only four ingredients and I could easily read them all! I bought a few and really enjoyed them. However, they are over a dollar a bar. After a few weeks I realized that I was having an allergic reaction to them. After researching my allergy, I realized it was the dates in the bars and how they were processed. I was so sad to say adios to my new go-to snack. I realized I could replace them with a home-made version! I researched several recipes, finding the easiest way to make them, and made one that is “safe” for me. KimBars Dates – I use fresh (Medjool) because they are “safe” for me. You can use dried, but may have to let them sit in a little bit of water to soften before chopping them. Cashews – I prefer raw unsalted. A pinch of salt – sea salt, of course! To make them, I used the same amount of dates and cashews with a pinch or two of salt. ½ Cup of Cashews – Chop in food processor (until pieces are really small, where some are fine like sand, but not too much, however, it’s all how you prefer them!) then dump into a bowl. ½ Cup of Dates – Chop in food processor until it forms a large ball. *I took one date out so it was less than ½ cup and preferred it this way – not as sticky or sweet. I add the salt to the nuts then dump them back into the food processor and pulse until it is all crumbly again. The first time I made the bars, I just added the dates to the bowl and kneaded it until it was all mixed, but the processor is faster and less work. Remove the mixture and form it into whatever shape you want! (You can even use cookie cutters, but my kids are older that just means more utensils to clean – balls are still lots of fun for kids!) Wrap each bar in plastic wrap and store in fridge. I made 3 bars out of this recipe. From now on, I will make much larger batches! Tip: After wrapping a messily formed log/bar in the plastic wrap, you can then form it into a nice, perfectly formed bar shape. There are tons of variations you can make, just keep the proportions similar. For example, if you want to make a fruit flavored bar, use half dates, half dried fruit (1/4 cup dates AND ¼ cup dried fruit) and the same ratio of nuts (1/2 cup cashews or ¼ cup cashews AND ¼ cup peanuts). Keep in mind this is a high-calorie snack. I eat only half a bar. Enjoy and have fun saving money AND being healthy! Kimberly Vogel www.kimberlyvogel.wordpress.com
Ok. So, the other day, Matt and I were discussing 2 bags of Monterrey Jack cheese we had in the fridge that I was SUPPOSED to use for one thing, but used forgot and used a different cheese. Yes, we were discussing cheese. Hey, it was in the fridge and must be used.
Matt suggested chicken enchiladas verdes, but I cringed. I know he does not care for it (he HATES cilantro) and the thought of bottled sauce made me gross out and the thought of making my own just sounded like too much work. So, I thought and I thought and I thought so more...picture Pooh Bear "think, think". Than I said...ok, let's take your idea and change it a bit. What if I made some chicken...shredded said chicken...mix in some canned chopped green chiles....put on top of tostata shells....top that with Jack cheese....bake in oven until melted...top with shredded lettuce and either pico de gallo or salsa. Yes, he said, that sounds great.
And thus was the culmination of tonight's dinner. I took a couple breasts...seasoned with garlic salt and pepper and broiled until done...shredded and mixed with one can diced green chiles....put evenly on tostada shells and topped with cheese. Baked until melty...topped with shredded lettuce...some salsa for Daniel, pico and salsa for Sierra and I, and plain for Matt.
QUICK...EASY....and thumbs up from everyone (and no more bags of Monterrey Jack cheese wasting away in my fridge).
Sorry no pics. What can I say...Wednesdays are crazy for us due to church!!
I don't quite know what to call tonight's dinner. I found the recipe on my favorite of favorite websites, Pinterest...well, I found the recipe and thought BOOORRRRRIIIIIIIINNNNNGGGGGG, but instead of just passing on it, I thought how I could make this boring recipe something different.
I think the original title was creamy chicken and noodles or something like that, that is how boring the recipe sounded. My first thought was...it needs something else besides creamy broth with chicken and noodles. What is this, campbell's soup?? So, I thought it could use some veggies. The idea is to not make a soup, though, or I would have added some celery and onion to it.
This is what I came up with...
First of all, this is a crockpot recipe! LOVE THOSE!!! This will be cooked in a crockpot for about 4-5 hours on low.
I placed 4 frozen chicken breasts in the bottom of the crockpot. Next, I added generous seasoning of garlic salt and pepper. After this, I put in 2 cans of cream of mushroom soup and 2 cartons of chicken broth. Let it cook for about 4 hours and than shred chicken and put back in and add a whole bag of raw egg noodles. Now, the original instructions said to let it cook for another hour, but I found that the noodles cooked much faster (maybe only 30 minutes). When you put the noodles in, taste the broth and make sure it is to a good seasoning level for you....add if you need to.
Here is where I decided to make some changes. I decided to add some veggies. So, I cut up some zucchini and red bell pepper and I sauteed them for a bit in olive oil seasoned with garlic salt and pepper. When to the desired crispness, I added the veggies to the pot (this was at the very end...I do not like mushy veggies).
Now...I tasted the concoction and announced to the family that this dinner was boring and I apologized. My kids shrugged, choosing to ignore my wailing. But, there was nothing to do about it now. We had to eat. So, I dished out everyone's meal and we sat down to eat.
And everyone raved at how they loved it. They said it was reminiscent of chicken and dumplings (the noodles had gotten to a certain level of creaminess having cooked in the creamy liquid). The veggies were crisp and yummy and the seasoning wasn't overwhelming, but wasn't bland. I am pleased with this concoction and will likely make again in the fall or winter.
I am not sure what to call it, but I would recommend it. It requires little work..assembly at the beginning and some chopping and sauteing at the end. I should mention that I did not chop or dice the veggies. I kept the bell pepper in 2 inch long strips and I quartered and sliced the zucchini....into about 1 inch chunks.
I love taco salad and there are many ways people make them. I know people who use doritos (yuck) or tortilla chips (we use tortilla chips as more of a topping to other salads). You can buy these pre-made bowls from like Old El Paso, but they are tiny and are consistent with their taco shells which makes me think...why not just make tacos.
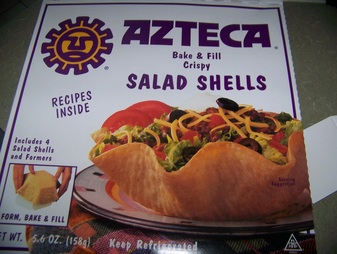
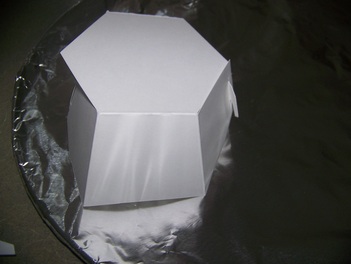
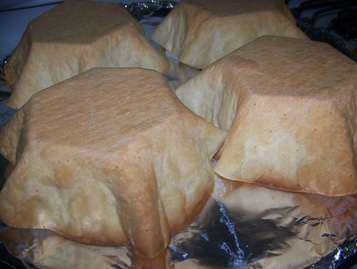
In my opinion, there is a key to good taco salads and it is ALL about the shell. There is a shell you can buy that you bake in the oven...it comes out crispy and oh, so yummy. The shell makes it; you can do whatever you want with it. Want chicken? GREAT!! Hamburger meat? Absolutely! Steak fajita? YUM!! No meat? Well...if you like. ;-)
These salad shells can be found (locally) in Kroger almost always, in Walmart occasionally, and at HEB NEVER!! They are found in the refrigerated section kind of by baked goods. It is a simple enough process. Let the flat, uncooked shells sit on your counter for about 10-15 minutes so it will be more pliable. Assemble the forms on a pan, drape the shells over the forms and bake for about 10 minutes. INCREDIBLE!!! The filling you put in can be endless. We have made it with chicken, shredded lettuce, different toppings. Tonight, I browned some hamburger meat...we used chopped romaine lettuce, lots of HEB fresh made pico de gallo, than hamburger meat, followed by shredded monterrey jack cheese, and than topped with HEB fresh made guacamole. It was very good...very fresh...and very versatile. Do yourself a favor and try these shells.
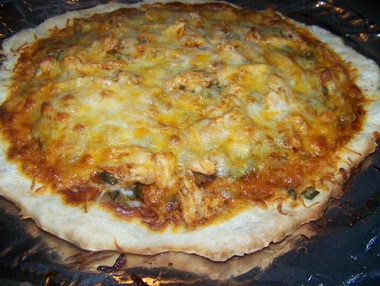
Tonight, I made two pizzas...but not your typical pizza. No pizza sauce. No mozzarella cheese. No pepperoni (not that pepperoni would EVER be allowed on my pizza).
I made Chicken Enchilada Pizza and boy, howdy, was it good. I found the recipe while perusing through the Pioneer Woman's cooking site...it's not one of her recipes, but one from Tasty Kitchen's site. As with anything new, I was nervous, but it was a fairly cheap dinner.
I made a mistake, though, that anyone who knows anything about cooking, especially cooking with peppers, knows that you shouldn't do!! I was chopping poblano pepper...taking out the seeds and ribs, but I forgot to wash my hands when I was done. NOT GOOD. A bit later, I reached up to touch my mouth...not sure why, but the burn was bad for several minutes. I touched my tongue and I could squealch that heat with a peppermint...but the area around my mouth burned and burned. I finally washed the area and dabbled on some olive oil...not sure if that would help, but it seemed to.
So, the recipe is simple enough.
The only changes I made (you KNOW I had to make changes): I used a pizza crust mix. I am not much on it, but I like it better than the premade crusts and I didn't want to take time to make a homemade one. I did buy monterrey jack cheese, but I forgot I bought it and used some mexican blend cheese instead. Also, I had some Hill Country Fair (HEB Brand) enchilada sauce left over from a previous recipe AND some Old El Paso sauce. I used the rest of the HCF sauce and than opened OEP sauce and was surprised to see that the HCF sauce was richer in color and consistency than the OEP brand. I informed Matt to buy it from now on!!
My kids LOVED the pizza...and so did Matt and I!!
Ingredients - 1 Tablespoon Olive Oil
- 1 whole Small White Onion, Peeled And Diced
- 1 whole Poblano Pepper, Stem And Seeds Removed Then Diced
- 1 can (4 Oz. Can) Diced Green Chiles, Drained
- 2 cups Shredded, Cooked Chicken
- 2 cups Red Enchilada Sauce, Homemade Or Storebought
- 1 whole Large Unbaked Pizza Crust, Homemade Or Store Bought
- 2 cups Shredded Monterey Jack Cheese
- 1 cup Fresh Cilantro, Stems Removed
Preparation Instructions Preheat oven to 425 F. Heat oil in a skillet over medium-high heat until shimmering. Add onions and poblano, and saute for 5 minutes or until onions are cooked and translucent. Add diced green chiles and cook for 2 minutes more. Remove from heat and set aside. In a bowl, toss the shredded chicken with a few spoonfuls of the enchilada sauce. Set aside. Put your crust into your pan or on your baking stone. Prepare the pizza by spreading the remaining enchilada sauce evenly on the crust, leaving a 1-inch border. Layer the onion/poblano/chile mixture evenly on top of the sauce, then add the sauced chicken, then sprinkle the top with cheese. Bake for 10-12 minutes, or according to the crust’s package instructions, or until the cheese is melted and the crust begins to turn golden brown. Remove from the oven and sprinkle with fresh cilantro. Slice and serve immediately.
Oh my, my, my. Last night, Matt opened my phone last night and, wonder of wonders, Pinterest was open on my phone. On the screen was a recipe I had just repinned for this chicken you cook in the crockpot and Matt instantly said...this is what we need to have for dinner tomorrow night. It was close to ten at night and I told him I didn't have the ingredients for the recipe and he said, "I have a car, I can go to the store." So, he did.
I hesitated about the recipe...it seemed to be missing something. The original recipe called for serving the chicken over rice or in tortillas. I don't know...I can't do rice (Sierra hates it). It seemed to soupy for tortillas. But, Matt requested it so what could I say?
All day long, I thought about it...while it cooked in the crockpot...and it finally came to me on our way home from running errands....CHICKEN ENCHILADAS!!
So, here is what I did:
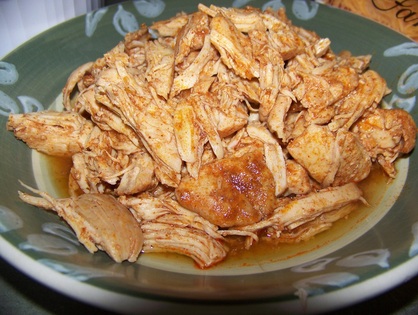
First, I put about 4 frozen chicken breasts into a crockpot. Next, I sprinkled half a package of taco seasoning on the breasts. Finally, I poured a bit over half a can of red enchilada sauce over that. That's it. I put the crockpot on low and let it cook all day.
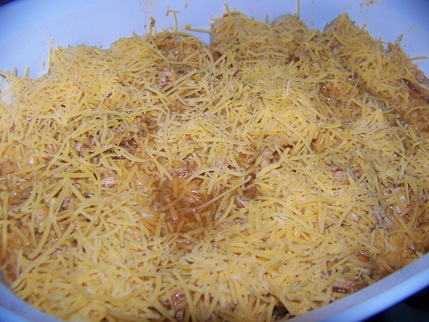
After about 6 hours, I checked the chicken...it was done. I shredded the chicken in the crockpot and let it sit in the crockpot for an additional 20 minutes (approximately). Next I took the chicken out, making sure to strain the sauce.
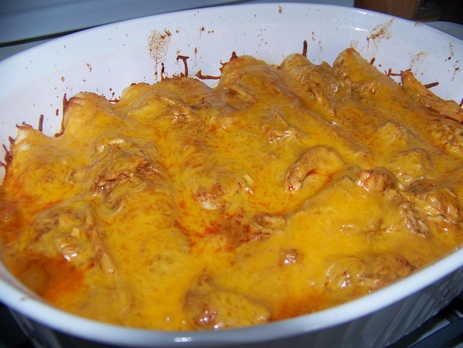
Next, I took some fresh from the bakery flour tortillas from Kroger. I individually dipped the tortillas into the sauce in the pot, filling each with chicken and shredded cheese (I opted for sharp cheddar). I rolled them up and lined the in a pan. I took the remaining sauce and the left over chicken and covered the enchiladas and than topped with more sharp cheddar cheese. I baked in a preheated 350 degree oven for 25 minutes. This was so easy and so flavorful and yummy. I think it is the best homemade enchiladas I have ever made. Next time, I might use a low sodium taco seasoning, but that will likely be the only change. I might top it with sliced green onions.
MAKE IT!! It is so incredible and easy.
 Daniel's favorite food in the WORLD is tortellini. When he turned 1, this was his birthday meal choice and he ate it all up.
This involves buying frozen, cheese filled tortellini...boiling it....tossing some bottled pasta sauce with it....and that's it. Nothing elaborate.
This is not a favorite to most of us. In fact, Sierra doesn't like it too much at all. SO, when she is out of the house for an evening...say on a sleepover...we let Daniel choose what he wants to eat for dinner and inevitably he asks for...tortellini.
Hey, it's quick...it's easy........it's cheap....and it makes my son happy which makes his mom happier. Sometimes, it's all about the boy!!
I have posted this recipe on facebook before, but it bears repeating here, on this blog. This recipe is super easy to make and loaded with yummy flavors. It is one of our favorite meals.
Now I have made this before for a friend's family and she said she loved it, but it had too much green for her kids (it has zucchini). It occurs to me that many kids may not like the recipes I post on here. I remember posting a recipe on facebook once for some dish...I can't remember what...and getting responses like, "what did the kids eat?". Why, they ate what I made of course.
My kids can be picky in some areas. Sierra does not like eggs, beans or bacon. Daniel does not like green beans. But, fresh veggies have never been a problem. Both my kids love salad loaded with good things. Sierra has professed that she could easily be a vegetarian, she just loves veggies so much.
My daughter wasn't always this good of an eater. She used to only eat PB&J or chicken nuggets, but it just took persistence...even this dish was not received so well at first. They would eat around the zucchini. But, the more I made this and other dishes with zucchini and soon, it became one of my kids favorite veggies.
One of the keys to zucchini is to NOT over cook it. Mushy zucchini is NOT good zucchini. It must be crisp tender.
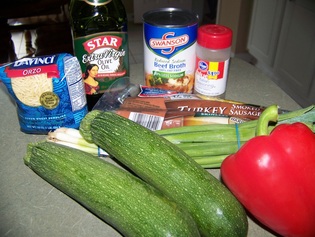
This recipe, I follow to the T, pretty much. I am using turkey sausage for obvious reasons. I also reduce the amount of water a bit so it will not be too saucy. I also halve the zucchini lengthwise and instead of coarsely chopping, I slice the halves in 1/2" to 3/4" slices. I am ACTUALLY taking a couple pics tonight! YAY ME!!!
Here are the cast of characters:
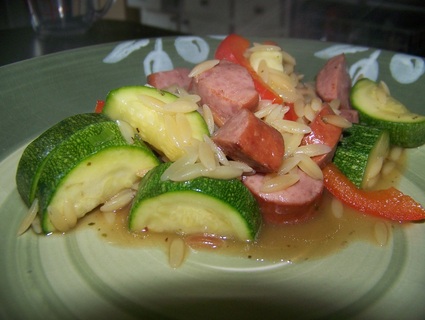
Sausage & Orzo
Ingredients:
1 lb. cooked sausage, halved lengthwise and cut in 2 -inch chunks
1 Tbsp. cooking oil
1 cup dried orzo (rosamarina)
1 14-oz. can low-sodium beef broth
1 tsp. dried Italian seasoning
2 medium zucchini, halved lengthwise, coarsely chopped (2-½ cups)
1/3 cup 1-inch slices green onions and chopped red sweet pepper
DIRECTIONS:
In large skillet over medium-high heat, brown sausage in hot oil 2 minutes; stir in orzo. Cook and stir 1 minute. Stir in broth, ½ cup water, and seasoning. Bring to boiling; reduce heat. Simmer, covered, 8 minutes or until orzo is tender. Add zucchini last 4 minutes of cooking. Stir in green onions and sweet pepper. Season to taste with salt and pepper. Serves 4.
It's been a while since I posted a recipe and I guess I got some splainin to do. Weekends are a toss-up on what may or may not be cooked. It's family time and we often spend the weekend doing stuff which may equal a subway dinner...or something thrown together really quick......or even the ordering of pizza. So, I will rarely post a recipe or what I'm cooking on weekends. On Monday, I did make dinner that I had EVERY intention of posting on here, but it was VERY disappointing. Really not good. I made chicken fajitas in the crockpot and I was pretty nervous of the outcome. It called for putting onions and bell pepper on the bottom and the chicken on top...pour on some chicken broth and top with seasoning. I thought....won't this make those yummy veggies mushy and lose flavor. Boy, did it ever. I prefer crisp-tender veggies as this is when they have the most flavor. I will stick with the oven baked fajitas I made a couple weeks ago that left my veggies crisp and was LOADED to the HILT with flavor. Here is the recipe, in case you forgot. But, last night, I put together a meal that was just mouth watering good. I am having a hard time remembering to take pictures which is very frustrating especially with a dish as mouth-watering as this one..and it was pretty too. I will get better. I promise. Now, I wasn't following a recipe with this dish, I honestly was trying to use things I already had. I had chicken breasts in the freezer and I had pesto and roasted red bell peppers in my fridge. I had already planned on making the Zucchini Chips, so I was trying to come up with something to make to go with them. And so...it came to me. Ok....First I defrosted about 4 breasts. They were large, so I could have made 3 breasts, but then the kids and I would not have had leftovers today for lunch. I mixed together the following ingredients in a small bowl (no measurements, I just eyeballed it to what I thought looked good...this is going to be a marinade): extra virgin olive oil, 2 minced garlic cloves, garlic salt, pepper, italian seasoning, and some lime juice (my lemons were bad and I had some bottled lime juice in the fridge and thought why not). I whisked this together and covered the breasts with the fragrant mixture and covered with plastic wrap to let the flavors mingle for a couple hours. When it was time to cook, I broiled the breasts on each side for several minutes until the breasts looked pretty cooked on the outside, flipping them over when one side was done. I pulled them out of the broiler and topped each breast with a generous spreading of pesto, some diced up roasted red bell pepper, and some parmesan cheese. My broiler is below the stove and I needed it for the zucchini, but it makes the oven nice and hot and you can keep cooking things in there while broiling. SO, I put the breasts in the oven, so they could continue to cook and the toppings could melt together in perfect harmony. So, then I prepared the zucchini chips. My kids LOVE these...I mean LOVE. My son could eat these by themselves at dinner. They are super easy and not bad for you (not the BEST, but not bad). I take two zucchini and I slice them into a little thinner than 1/4 inch slices. I spray a baking sheet with Smart Balance spray and arrange the slices into a single layer in the pan. Next I spray the slices with some "I Can't Believe It's Not Butter" spray. I sprinkle them with greek seasoning (not too much), top them with parmesan cheese. When you broil them, keep an eye on them...you want the cheese to get golden, but do not want the zucchini to get mushy. By now, the chicken is fully cooked and the zucchini is ready. All you have to do is serve. Let me tell you, this meal was incredible. The chicken was moist and flavorful. We all agree that pesto is from heaven. The zucchini chips are always loved...in fact my son always asks for more. Every plate was cleaned and the kids and I enjoyed more chicken today at lunch...I boiled some pasta and added the left-over pesto to it and some parmesan cheese. MmmmmMmmmmmm
Sound boring? Well, it's NOT. Lots of recipes to post.....So, I will forego the blogging...to a point. :-) Plates are cleaned...the grades are in. Matt gave it an A+...Daniel gave it a quick A+++++++.
TOMATOES
Slice large tomatoes into thick slices. Marinate them in balsamic vinegar for 1 hour. After it marinates, lay in a pan and cook in 350 degree oven for 7 minutes until they soften. Top with Italian blend cheese and broil until the cheese browns.
*Now, I would add some seasoning to the tomatoes while it cooks...basil would be great!!
PESTO ORZO
Ok, so simple recipe with LOADS of flavor. I cooked orzo as directed. LOVE orzo. After you drain it, mix in some pesto, feta and Italian cheese blend. SO SIMPLE...and LOADED with yumminess. I mean, seriously...such an EASY side dish and it doesn't taste like tired macaroni and cheese.
PORK CHOPS
This is a staple in our house. This can be used with pork chops or chicken and I make them all the time with each. With pork chops, I use very thin cut pork chops.
So, I dip the pork chops in egg and a tiny bit of water whisked together. Next, I dip the chops in a bowl that has a mixture of bread crumbs (I use Panko), some parmesan or italian blend cheese (a couple small handfuls), and generous seasoning (I use garlic salt and pepper). I take the chop and press in generous amounts of the breading.
Next I melt about a 1/2 tablespoon of butter and olive oil. Cook each side in a skillet that is on medium-medium high heat. Being thin, it takes only minutes per side.
This is a HUGE hit in the family...and great for pork chops and chicken. When I do it with chicken, I flatten them nice and thin.
And than, I had to make a dessert! I made an Earthquake Cake. When dealing with baked goods, there is no not measuring, so here is the recipe that I came across...it is not my own. Winner!!!!!!
EARTHQUAKE CAKE
1 cup coconut
1 cup chopped nuts
1 box chocolate cake mix
1 8oz package cream cheese, softened
1/2 cup butter (1 stick) softened
1 teaspoon vanilla
2 cups powdered sugar
3/4 cup chocolate chips
Grease a 9-by-13-inch pan. Sprinkle nuts and coconut on bottom of pan. Mix cake mix as directed on box. Pour over nuts and coconut.
In a separate mixing bowl, beat together the cream cheese, butter, sugar and vanilla with a hand mixer on low to medium-low until well blended (add the sugar about a half cup at a time to prevent a powder explosion). This mixture will look like thick cheesecake batter.
Drop by spoonfuls over the chocolate cake batter, leaving at least a one-inch margin around the sides of the pan (this prevents the cheesecake from bubbling over).
Weave a butter knife in an s-pattern through the batter to create a swirl, but be sure to not disturb the nuts and coconut — keep the knife very shallow. Sprinkle with the chocolate chips.
Bake at 350 degrees for 50 minutes.
|

 RSS Feed