Tonight was a new one from Pinterest that looked appetizing and I am READY for soup...even if it is in the 90s outside!! The votes for how it turned out was split...more in FAVOR of keeping the recipe and making often than NOT. Let me first say that the recipe on it's own was bland....REALLY, REALLY bland. The amount of Italian Seasoning, I thought, was TOO MUCH (maybe it was my seasoning) and than there was far too little of the other seasoning. I tasted...added more pepper....tasted.....added more salt....tasted....added more onion powder....tasted....added more pepper.....tasted.....added more onion powder....tasted....added some greek seasoning....gave up and informed everyone that it was just ok. Than Sierra, who was about to starve to death, requested her food early...and raved about how great it was. Before the rest of us could even get our soup, she was asking for seconds. Matt said it was great and wanted it in regular rotation. Daniel didn't say anything, but ate it all which equals liking it a lot. I felt that it lacked some flavor, but I was over ruled. I wonder if it would taste better with chicken. So, here is the recipe, as originally written. Like I said...I would add seasoning. Creamy Tomato Tortellini SoupPrep Time 5 Minutes Cook Time 15 Minutes Servings 5 Difficulty EasyIngredients - 2 whole Large Cloves Of Garlic Minced
- 2 Tablespoons Olive Oil
- 2 cans 10 3/4 Oz Cans Of Condensed Tomato Soup
- ½ cups Sun Dried Tomatoes, Chopped Or Two Tablespoons Of Sun Dried Tomato Paste
- 1-½ cup Milk
- 2 cups Half-and-half
- 2 cups Chicken Stock
- 1 teaspoon Onion Powder
- 2 Tablespoons Italian Seasoning
- ½ teaspoons Salt
- ½ teaspoons Pepper
- 1 whole 9 Oz Package Of Cheese Filled Tortellini
- ½ cups Shredded Parmesan Cheese
Preparation InstructionsSaute garlic with the olive oil in a large stock pot over medium heat until golden brown. Be sure to keep an eye on it so it doesn’t get too brown or burnt. When the garlic is done, add tomato soup, tomatoes, milk, half and half, chicken stock and spices. Bring to a simmer. Once simmering, drop noodles into the soup. Cook according to the package directions. Mine takes about 8 minutes. After noodles are cooked, ladle soup into bowls and top with parmesan cheese and serve with crusty bread. Enjoy!!!
I know it has been a while since I posted a recipe on here. The benefits of a birthday is when going out and this particular birthday had us going out A LOT!!! We have eaten out more in the last week than we typically do and by the end of the splurge, I was DYING to get back to home cooked meals. Last night was my first night back cooking and I made pork chops and mashed potatoes. Nothing too exciting to share there. Tonight, on the other hand, is different.
I love french bread pizza. Typically, I do a traditional type of french bread pizza...I take french bread and I slice it down the middle. I put pizza sauce (I like Catalina's...or something like that) on and top with canadian bacon, red onion, pineapple, and mozzarella cheese. I have also made it with alfredo sauce, chicken and cheeses. Tonight...oh tonight...what a treat I came up with!!
My family (and I) LOVE mediterranean food. Feta...olives...hummus...the list goes on. I wanted to do french bread pizza tonight and my initial thought was to make the alfredo chicken pizza, but I didn't want to cook chicken, so I got my brain cells working....
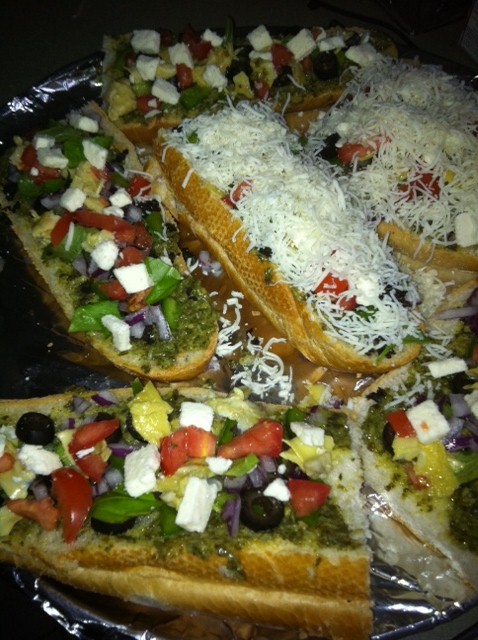
Mediterranean French Bread Pizza
French bread, sliced in half
Chopped up: green bell pepper, red onion, marinated artichoke hearts, roma tomatoes
sliced or chopped olives
feta, crumbled
basil pesto
fresh basil
mozzarella cheese
Spread the pesto on the bread as you would pizza sauce. Place the veggies over the pizza how you like. Put on feta and top with mozzarella. Cook in preheated 425 degree oven until melty. Oh my word..the flavors are amazing together.
This left one kid with an empty plate and the other asking for more!! Now, it was not in my plans to make a dessert, but a friend on facebook posted that she was making STRAWBERRY BROWNIES. Uh...excuse me?? What is this you are saying?? Me (and several others) asked for her to share her recipe. Now I am a bit worried about this..strawberry things tend to make my daughter sick. Well...another friend said...I bet these would be good as LEMON BROWNIES!! Uh.........YEAH!!! I called my husband immediately giving him instructions on what to buy and I was ready to bake as soon as he came in...and it is easy to bake so no big deal!
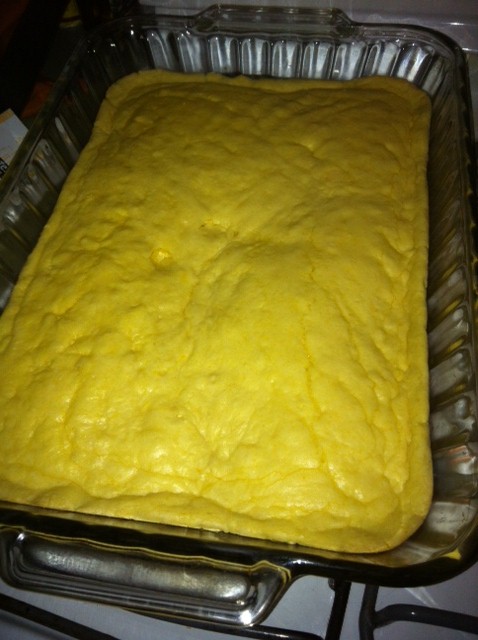
LEMON BROWNIES (SO SIMPLE)
Take one box of lemon cake mix (or strawberry). Add 2 eggs and 1/3 cup oil. Mix together. It will be thick, much the consistency of play-doh. Press into a 9x13 pan (I greased with BUTTER), and press in evenly. Bake in 350 degree oven for 14 minutes!! YES, 14 minutes.
Oh YEAH!!!!! Not a great picture, but YUM!!
The other day I was trying to plan a menu for the upcoming week and I found myself having a hard time focusing. I just wasn't into it. Further, I recognized this was a pattern I have fallen into lately...a lack of motivation. I have been focused on getting ready for school and other family events and found I lacked the brain capacity to do anything further. This ended up with lots of eating out, both fast food and regular restaurants. It has not been good.
I got to thinking of my recent organization of my homeschool...how I planned ahead. I thought back to last year when I would be faced with planning a week's lessons and lacked the motivation and how pleased I am now to have it all planned out and it came to me. I should plan a monthly menu. I have heard of others doing that and I thought they were nuts....but I just sat down and planned out through the end of August and all of September and I am satisfied with my work. Like the homeschooling schedule, I will be flexible...this is more of a guideline.
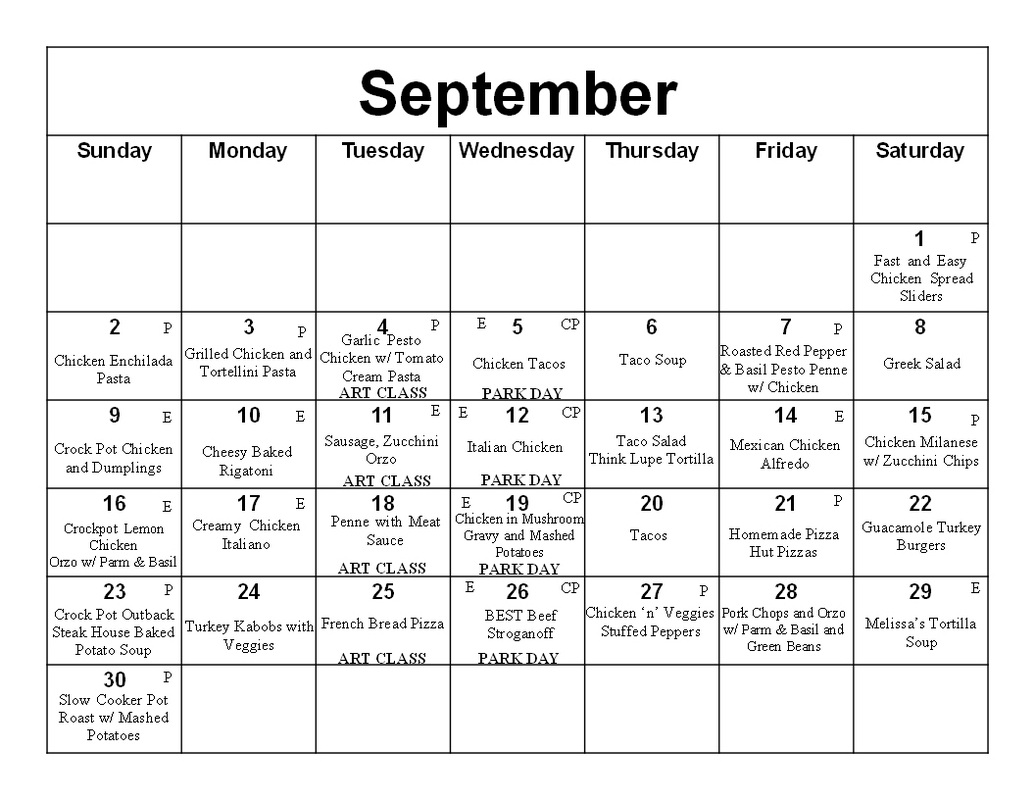
Here is what my calendars look like. I will print them and post them on my fridge. A couple things I added to my calendars:
First of all, I added, in September, the titles of Park Day on Wednesdays and Art Class on Tuesdays. Both of these are afternoon events that have me getting home late, so I need dinners that are less complicated on these days.
Secondly, in the upper right corner on Wednesdays I have CP which means Crock Pot. Park Days, I often do not get home until 5 or later and we have to leave around 6:15 for Wednesday Night Church...add to that that Daniel works up quite a sweat and dirt, so he needs to take a shower when we get home. So, Wednesdays are Crock Pot days for my sanity.
Thirdly, you may notice an E or a P in some squares....this lets me know if the recipe is found in my Evernote or in my Pinterest. No letter equals no recipe needed.
It's all about simplifying life.
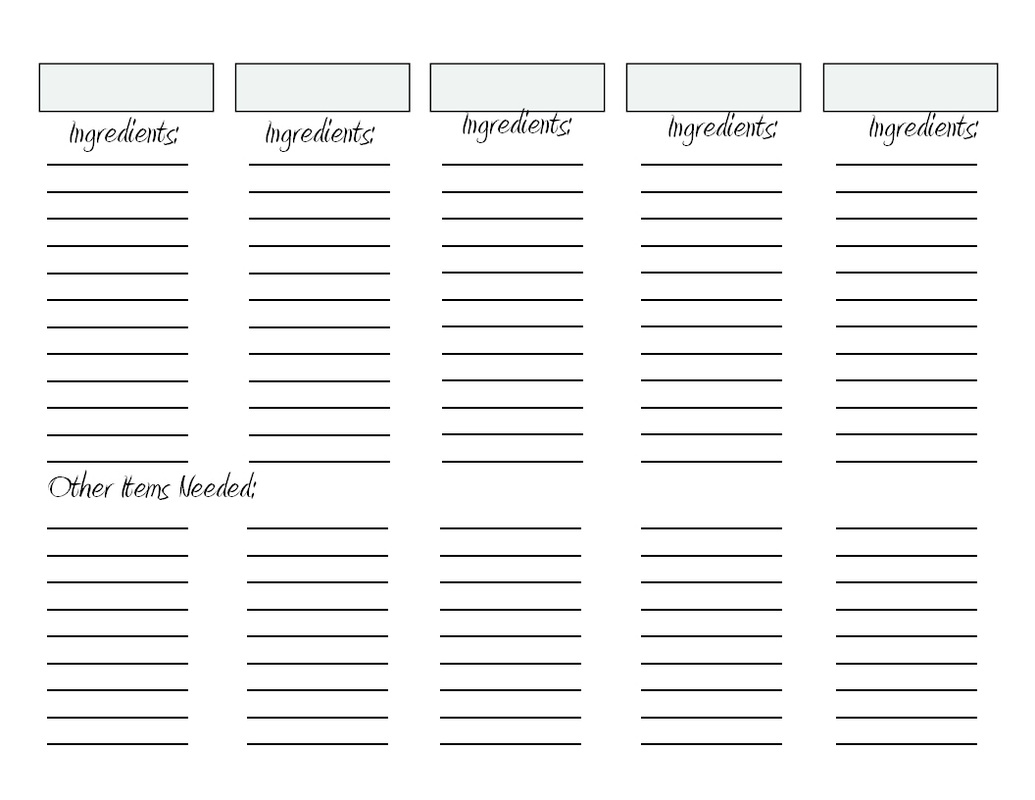
Further, I was inspired by Pinterest to create a list writing system that I can be more organized with and help eliminate missing ingredients. Here is what my version looks like: In the grey box, I will put the title of the recipe and list the ingredients needed on the lines.
So, be inspired or put me in the crazy category. I am glad to have more brain space used on other things. Let's face it...I'm a mom and a home school educator....I need as much brain space for other things as possible.
Warning: the following post does not contain any pictures or measurements. What can I say...I cook with one thought in mind...preparing a meal for my family. Later, I think...oh, shoulda got a picture of that!!
Now that that is out of the way...
Many years ago, I used to make stuffed bell peppers that most anyone who ate would just go nuts over. Than I had a daughter and that daughter had a huge dislike of rice. While I do not tend to pander to my kids, I do understand not liking a particular ingredient and when said ingredient is a BIG part of a recipe, I do tend to opt out of making it. It has been so long, I hardly remember what those peppers tasted like. The other day, though, I was going on a stroll through the lovely land of Pinterest and what should my eyes see...a few different recipes for stuffed peppers. My mouth watered and then I saw the rice. A tear came to my eye....and a small light flickered in my over Olympic run brain...the light of an idea that sprang on, full force (after a time) and I knew must try a new idea on the stuffed bell pepper.
I did not follow a recipe. Like going through a virtual grocery store and seeing cans, and veggies and cheeses and such, my brain began ticking off different combination ideas until, VIOLA!, the list was sealed and the idea was firm and all I needed was a trip to the real grocery store. Last night, I assembled what my mind came up with, crossed my fingers, and waited for the results from the judges, I mean family (WAY too much Olympic watching).
Sierra was the first to try it and she said "This is AMAZING!". One jud- er...verdict done. Daniel took a bite and he said "MMMMMMMMMMMMMM". 2 for 3. Matt finally got his bite in and said "Oh my gosh, this is so good!" YES!!! Gold medal....uh..... figuratively speaking of course!!
So, what did I do. I am breaking it up in parts, but you would likely do all of these at once...make up your own rhythm.
First, bell peppers. My local store had a GREAT special on bell peppers, and my kids LOVE red ones, so I bought 4 VERY LARGE red bell peppers and 2 largish orange ones (the green ones were puny). I cut off the tops, dug out the seeds and ribs, cleaned and set aside. I put on a large pot of water and brought to a boil....I generously salted the water in order to give the peppers a boost of flavor. When at a rolling boil, I put a couple peppers in. These peppers were so large, they were not completely submerged....so I would turn them in order to get equal cooking! You do not want to boil them long...no more than 3 minutes. With tongs, I took them out one at a time, turning them over to drain water from them and than sat them up in a baking dish (hole side up). Repeat until all are done.
Next, the stuffing!!! In the past I used ground beef...but in the interest of a healthier lifestyle, I used ground turkey. I chopped up half a small white onion and browned the turkey and onion together. Now, turkey can be bland, so it needs generous seasoning to perk it up. I added some coarse garlic salt and pepper to the turkey and onions as they cooked. Make sure to drain it as you go along. Once cooked, add a can of stewed tomatoes (I used italian recipe stewed tomatoes). Break up the chunks of tomato and stir it up to combine and let it simmer.
Now, while doing this, you should be making some orzo...yes, orzo. It is a very small pasta...much the same size as rice. Now, I wanted the orzo to absorb some of the tomato juice in the turkey pan, so I followed the directions for cooking the orzo, but stopped 2 minutes before done. How much orzo? I didn't really measure. I think it was about 1/2 cup dried orzo..give or take. When the orzo is done (remember just 7 minutes...2 minutes earlier than directed), drain the orzo and add to the turkey mix. Make sure you stir to combine and let it simmer for 2 minutes...stirring occasionally.
The next part may be controversial to some, but WE LOVED IT! I took a mixing bowl and dumped the turkey mixture in it. I then dumped a container of feta in it and a couple handfuls of mozzarella cheese and a handful or so of parmesan. I mixed this up really good and than began putting the mixture into the bell pepper cups. This mixture was exactly enough for my 6 large peppers.
I put the peppers in my 350 degree oven and let cook for 15 minutes (ok...I was making bread that needed a 400 degree oven, so I turned it up to 400 for the last 5 minutes).
That's it. Not one of my simpler recipes, but not a hard one either. It was GREAT and I look forward to leftovers tonight!!
The other day I made lemon cookies from a recipe I got from Pinterest and boy let me tell you...they were FANTASTIC....much to the disappointment for my kids....I made them for a pool party which meant there were none to keep. On the flip side, they are incredibly easy to make and I plan to make a new batch in the next day or two for my kids. When baking, it is usually best to keep to the recipe explicitly...the only real change I made was a used a bit more than a teaspoon full per ball. These are made much like snickerdoodles and are really incredible...and different from your typical cookie flavors!! I give it an A+++. Here is the site you can find it at and here is the recipe: Lemon Crinkle CookiesMakes 2-3 dozenIngredients:½ cups butter, softened 1 cup granulated sugar ½ teaspoons vanilla extract 1 whole egg 1 teaspoon lemon zest 1 Tablespoon fresh lemon juice ¼ teaspoons salt ¼ teaspoons baking powder ⅛ teaspoons baking soda 1-½ cup all-purpose flour ½ cups powdered sugar Directions:Preheat oven to 350 degrees. Grease light colored baking sheets with non-stick cooking spray and set aside. In a large bowl, cream butter and sugar together until light and fluffy. Whip in vanilla, egg, lemon zest, and juice. Scrape sides and mix again. Stir in all dry ingredients slowly until just combined, excluding the powdered sugar. Scrape sides of bowl and mix again briefly. Pour powdered sugar onto a large plate. Roll a heaping teaspoon of dough into a ball and roll in powdered sugar. Place on baking sheet and repeat with remaining dough. Bake for 9-11 minutes or until bottoms begin to barely brown and cookies look matte {not melty or shiny}. Remove from oven and cool cookies about 3 minutes before transferring to cooling rack. *If using a non-stick darker baking tray, reduce baking time by about 2 minutes.
Greek? Well, maybe Greek.....ish. I was planning on making this completely and totally different, but lack of time and lack of finding a key ingredient caused us to change it up a bit...and the result was good...not better than if I had the time and original ingredient....but a good, QUICK alternative. It was VERY fresh and very good and I would recommend it.
So, we had flat bread and I love that so much more than pita bread.
Spread on some of that GREAT tzatziki sauce.
Put on some toppings: cucumber, feta, spinach, olives, chicken, lamb, turkey, red onion, parmesan cheese, etc.
This is what we did: flat bread, tzatziki sauce, spinach, precooked chicken (this was the quick part), roasted red bell peppers, shaved red onion and topped with feta....roll up and eat.
INCREDIBLE and FRESH dinner on a warm summer night!!!
I warned you on a previous blog that my blogging would be sparse over the term of the Olympics and it is VERY true. Every four years, I shut down for a week or so and get little done in my house including cooking. I try to come up with the easiest meals or meals that Matt can cook as I sit on the couch caught up in watching America fight for gold.
BUT, I did manage to cook yesterday...it wasn't something I intended to cook, but what I ended up cooking turned out SO incredible, that no one was complaining.
When I planned the meals for the week, I planned on making Turkey Gyros. I have made these before and they are just delicious and very fresh tasting. I sent Matt to the store with my grocery list and he was able to get everything on the list including everything for the gyros EXCEPT for the turkey breasts. He tried another store...no go. He tried ANOTHER store...nope. I went out and looked...there must have been a run on turkey breasts...there were none to be found.
Yesterday I stood in Kroger thinking...I have tzatziki sauce, feta, roasted red peppers....what do I do now? I called Matt... We brainstormed together and he suggested turkey burgers (we have come to LOVE turkey burgers FAR MORE than beef burgers). The little computer man in my brain started typing fiercely and an idea was born. I got the ground turkey and hamburger buns and headed home.
So, this is what I did.
First of all, I HIGHLY recommend cooking turkey burgers (and other burgers) in a panini press or foreman grill or something like that. It helps keep the burger juicy. I preheated my panini press and assembled the burgers.
Turkey burger part: I put the turkey mean in a bowl. I sprinkled in generous amounts of garlic salt and pepper. *A note about garlic salt...I bought at Kroger the other day a Kroger brand garlic salt that is coarser than other garlic salts and wonderful!* I also tossed in a couple handfuls of feta (we LOVE feta...and these chunks were HUGE). Using my hands, I mixed the meat, seasonings and feta together until well incorporated. I divided the meat into threes (my son had an unexpected sleepover opportunity and left) and made the patties.
Bun Part: I took generous levels of tzatziki sauce and spread over both buns. I LOVE that stuff. My daughter LOVES onion, especially purple onion, so I put thick slices on her bun, medium on Matt's and fine on mine. I cut up some roasted red pepper and put that down.
Next I grilled the burgers (mine were large, so I did them one at a time). My panini press' top plate is hotter than my bottom plate, so I flipped them a couple times to ensure even cooking. I do not know the time, you can be the judge of that. I had the press at a bit over medium heat.
I placed the burger on the bun, topped with some fresh spinach, placed the other bun on top and that was that. Sierra got served first (she is always starving) and I waited to hear her review...and she said it was incredible....one that needs to be repeated often. When I tried mine, I was in awe. So many people complain about turkey burgers being dry...but I think it is all in the way you cook it and serve it. We have found them made in the panini press gives them such juicy yumminess and topped with many different toppings (guacamole is a fave) helps, too. Do not forget to season your meat. Use your own judgement, but I was fairly generous in how much I used.
There was SO MUCH flavor...juicy-ness...and the mixture of the melted feta in the meat, the roasted red peppers, tzatziki sauce, onion and spinach just complimented it beautifully. I cannot emphasize how much I would recommend this burger...it was one of the best I have EVER had!!
|


 RSS Feed